The Right Address

by Dr. T. J. Tomasi, Keiser University College of Golf Senior Faculty and Director of Research
The term “set-up” is a good one because that’s just what this portion of your pre-shot routine does – it ‘sets up’ your whole swing.
Now you may not have the athletic talent of a tour player once the swing starts (few do), but every golfer has the ability to set up like an expert, so there are no excuses when it comes to getting this part of your swing down pat. From bottom to top, there are five checkpoints for your perfect set-up. All references are in relation to the target line, that imaginary straight line connecting your ball and the target:
1. Feet:
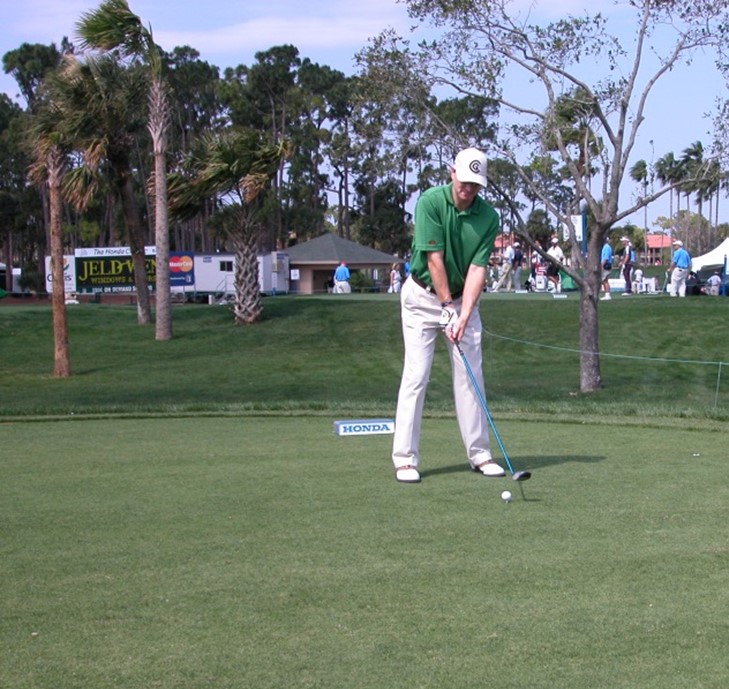
Your feet should be turned out about 25 degrees (a quarter of a turn). This makes it easier to rotate your hips correctly as you swing. The amount of flare depends on how flexible you are and the ball flight you want. High flex golfers with swings that are too long should use much less back foot flare, while slicers should de-flare the front foot. Our lefty pro model, Steve Flesch, is about standard with, both feet flared the same. The width of your stance is measured using your heels. Take your stance and without moving your feet, mark the position of your heels with two tees, then move away and check your width – the tees should be hip-width apart. To match your hips and heels, use the outside rim of the hips and the middle of your heels.
Note: your stance widens in small increments as the club lengthens until with the driver; the heels are about shoulder width.

Our model’s heels will move closer together as the club changes until, for the short irons, the heels are hip-width.
2. Knees:
Your knee flex should match the knee bend of your normal walking stride just as your forward foot flattens on the ground.
Note: If you can see your shoelaces, you have too little flex; if you can’t see your toes, you have too much.

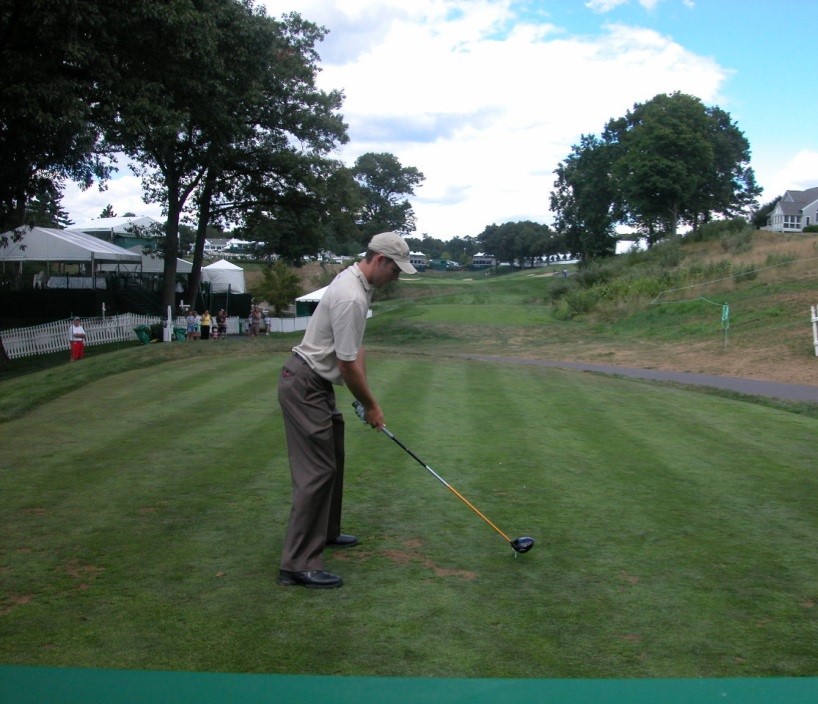
Charl Schwartzel looks so comfortable because this is the natural flex point of his knees, perfectly matched to his flexibility and body physique. Note how neither of our tour models look squatty.
3. Hip Joints:
The tilt of your upper body toward the ground ranges anywhere from 25 to 35 degrees and is controlled by how much you bend from your hip joints. Please notice that both our tour models bend from their hip joints and not their waist. When you bend from your waist, you de-activate your center of rotation, so your hip joints lock up, forcing sliding instead of turning. When you assume the correct address position, your abdomen is retracted both backward and upward, so your fanny protrudes. To get the feeling, imagine that you’re about to sit on an above-the-waist, three-legged stool. The traditional image of a regular height stool causes too much knee bend.
4. Shoulders:
The shoulder checkpoint features your arms hanging under your shoulders, with your upper arms adhering lightly to your torso as if they were velcroed to the sides of your chest. The test is; After you assume this position, open your hands and drop the club to the ground – if you are correctly positioned, your arms will not change their angle of hang when you relax.
5. Head:
Your head should be positioned in the middle of your shoulders with your chin held high in the proud position. If you let it rest on your chest, it blocks your shoulder turn. This proud position requires you to “peep” at the ball with the bottom of your eyes rather than stare at it with a droopy head.
Note: Don’t wear bifocals when you play golf because they force you to drop your head to see the ball. This causes your chin to block your shoulder rotation.
Takeaway: In both models, the overall set-up position is one of “springy readiness.” Run through each checkpoint from bottom to top every time you take your set-up, and soon your set-up will become automatic.
The above are starting recommendations that should be adjusted based on your ball flight and body type, i.e., flexibility, contour, strength, lever length, muscle layers, fat distribution, injury profile, etc. (see my book The LAWs of the Golf Swing for expansion).
If you’d like to study with Dr. Tomasi and other PGA Master Professionals, contact The College of Golf today.


