


Shape Your Shots

By Dr. T. J. Tomasi, Keiser University College of Golf Senior Faculty and Director of Research
In the pro ranks, there are differences in standard ball flight. Some players draw the ball, and some fade it, while some hit the ball without much curve at all.
Depending on the situation, most of the time, pros stick with their bread-and-butter spin. In-the-know announcers (usually former players) can tell the kind of spin a player is about to employ by how much rotation of the forearms the player is rehearsing in his practice swing and where they are aiming. However, shaping shots while playing probably is not a good idea for the average player; herein lies a way for you to change ball flight on a permanent basis, should you be so inclined.
To switch from a fade (or slice) to a draw and vice versa, the first step is changing the way you release your forearms. The rule of thumb is: To draw the ball (right-to-left curve for right-handers), the back forearm begins to rotate over the front forearm before the elbows fold after impact. To curve the ball the other way, the back forearm stays under the front one until the elbows fold.
A good drill that will help you find the curve you want is to tee the ball and hit 7- irons with your legs so close together that the insides of your ankles touch throughout the swing. You’re trying to hit the ball only about half as far as normal with a slight draw or fade. This drill will teach you to blend your chest and arm release.
For the draw release, concentrate on a soft but constant rotation of your forearms during the downswing. Do the opposite for the fade – don’t hold your chest back, but let its turn be paced by your muted forearm rotation. Note that both tour players in the photos below have their arms straight so that an extension of the shaft would meet the middle of their chest.
The ability to create this arms-in-line-with-chest position documents the synching of the arms and body. Pose in front of a mirror in the correct after-impact position seen below. Repeat until you learn it. Since 70 percent of your neurons are in some way dedicated to vision, the mirror is your most effective learning tool. Say to yourself –“this is the draw position” or “this is my fade position.”
Note: The key questions of exactly how much to rotate and when to begin rotation are answered through practice.
Note: The concept of forearm rotation is learned through practice, but as soon as you put the card in the pocket, this part of the swing should be non-cognitive; i.e., you shouldn’t make this something you attempt to consciously time. Most thoughts about the swing are best restricted to practice – forearm rotation is a concept, not a swing key.
Comment: Years ago, I lived across the street from the North Palm Beach CC in Florida where almost every week I played in a foursome with three very accomplished high school golfers. Of the three, only one practiced very hard and made it on tour – Mark Calcaveccia.
The point of the story is that of three young players – all about equal at the time I knew them– only one made it – and it wasn’t just coincidental that he was the player who practiced all the time.

Charles Howell III is curving the ball from right to left using a draw release pattern where his forearms rotate aggressively, the right over the left.
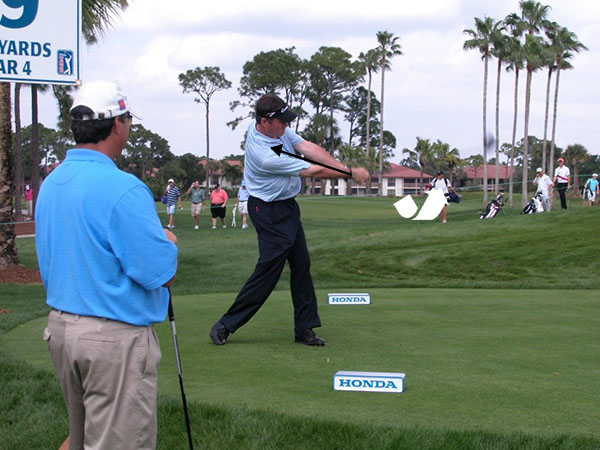
Former British Open champ Todd Hamilton uses a much quieter underarm than Howell to produce his characteristic fade.
If you’d like to study with Dr. Tomasi and other PGA Master Professionals, contact The College of Golf today.