


DIY Golf Training Aids: Teaching Aids You Can Make At Home
 by Dr. T.J. Tomasi A Legacy Post by Keiser University College of Golf Senior Faculty and Director of Research (1940-2023)
Every expensive teaching aid started with a dirt-cheap prototype that, in many cases, was just as effective as the “Madison Avenue” version that consumers buy. If you’re a golfer who can’t or doesn’t want to pay retail for your swing aids, here are some of the most important ones that you can make at home, along with the swing principles they teach.
12 Things To Consider Before Buying a Golf Training Aid
- Lack of Customization – Many training aids are designed for the average golfer and may not address your specific swing flaws or areas of improvement. If it doesn’t align with your unique needs, it could be ineffective or even counterproductive.
- Dependency Risk – Over-reliance on a training aid may hinder long-term improvement, as it might not teach you how to adapt to real-life situations on the course without the aid.
- Cost Concerns – High-quality training aids can be expensive, and if they don’t deliver the expected results, they may not justify the investment.
- Learning Curve – Some aids require time and effort to understand and use effectively. If they’re too complicated, they can become frustrating and discourage practice.
- Temporary Fix – Training aids often provide quick fixes rather than addressing the root cause of swing flaws. Without proper coaching, you may revert to bad habits once the aid is removed.
- Limited Use – Many training aids are designed for specific drills or techniques, limiting their usefulness in other areas of your game.
- Storage and Portability Issues – Bulky or fragile aids can be inconvenient to transport or store, reducing their practicality for regular use.
- Durability Concerns – Lower-quality aids may wear out quickly, requiring frequent replacements and adding to the overall cost.
- Interference with Natural Feel – Using aids that force specific movements may disrupt the natural rhythm and feel of your swing, making it harder to perform consistently without the aid.
- Ineffective Without Proper Guidance – Training aids often need to be paired with proper instruction or coaching to be effective. Without guidance, they might not produce the desired improvements.
- False Sense of Improvement – Training aids might simulate improvement during practice but fail to translate those gains to real play on the course.
- Availability of Free Alternatives – Many drills and training techniques can be practiced without purchasing specialized aids, using simple tools like alignment sticks or homemade solutions.
Homemade Golf Training Aids
Homemade golf training aids are simple, do-it-yourself tools or devices crafted using readily available materials to assist golfers in improving various aspects of their game. These aids are designed to replicate the functionality of commercial training equipment but at a fraction of the cost. Teaching aids can target specific areas of the swing, such as mechanics, alignment, or grip consistency.
For example, items like a pool noodle can be used to improve swing path, while a yardstick might help with putting alignment. Creating aids requires little effort and expense, making them available for all golfers. Homemade aids also encourage creativity, golfers personalize their tools to suit their unique needs. It’s important to make sure these aids are used correctly to avoid reinforcing poor techniques.
Benefits of DIY Golf Training Aids
DIY golf training aids have a variety of benefits for those who are looking to hone their skills. Homemade tools are an affordable option compared to expensive commercial aids. Opting to create a training aid instead of buying one allows a golfer to create effective practice solutions using materials readily available at home. This lower cost not only makes training accessible but also encourages golfers to experiment with custom designs that address their unique challenges and mistakes.
The process of making and using DIY golf tools helps players identify specific weaknesses in their game. Creating a tool specific to your weakness, such as swing path, alignment, or tempo, provides greater improvement and more ability to customize the training aid. By customizing the aids to personal needs, golfers can optimize their practice sessions and build confidence in their abilities.
Watch a Video from the Keiser College of Golf YouTube channel to learn more about building a homemade golf training aid:
Golf Training Aids You Can Make At Home
Golf Training Aids You Can Make At Home
1. A Board Over a Shaft
Cost Estimate: $5–$10 for a wooden board or piece of scrap wood. If you already have an old shaft, additional costs are negligible.
This teaching aid is designed to teach you weight transfer. All you need is an old golf shaft and a board.
The Swing Principle it teaches: Weight shift
How to: Place the board over the shaft to make a teeter-totter, and then stand on the board with one foot on each side of the shaft. There is a hip switch in every good swing where the weight transfers to your trail hip on the backswing (the board teeters backward) and then the target hip on the downswing (the board totters forward).
2. Wire Coat Hanger
Cost Estimate: $0–$2. Most households already have unused wire hangers, making this practically free.
The Swing Principle it teaches: Eye alignment over the ball
How to: Use a coat hanger with the hook extended like a finger, then bend at a right angle so that it points at the target. Since the wire is malleable, it can be configured so that it fits around your head at address with the “finger” of the coat hanger pointing down the eye line. You then position your head so the “finger” is over the target line for a perfect eye-line match when you putt. You’ll look ridiculous, but you’ll putt better.
3. Clubs End-to-End Swing Principle:
Cost Estimate: Free if using your own clubs.
Swing Principle: Body action during pitching
How to: Place two clubs end to end or plug a 3-foot dowel into the end of your club. With the extension against your rib cage, if you overuse your hands/arms, the shaft raps you in the ribs. This aid teaches you to keep your chest moving during both pitches and chips.

Here I’ve used two clubs, grip to grip, but a 3-foot dowel plugged into
the butt end of your club works quite nicely.
4. A Comb or Ruler
Cost Estimate: $1–$3. A basic ruler or old comb can easily be found at home or purchased inexpensively.
Swing Principle: How the wrist is positioned throughout the swing
How to: Slip a comb or ruler into your golf glove so the aid keeps your wrist in line with your forearm while you swing. Anchor, if necessary, with an ace bandage. This prevents your target wrist from breaking down during the swing.
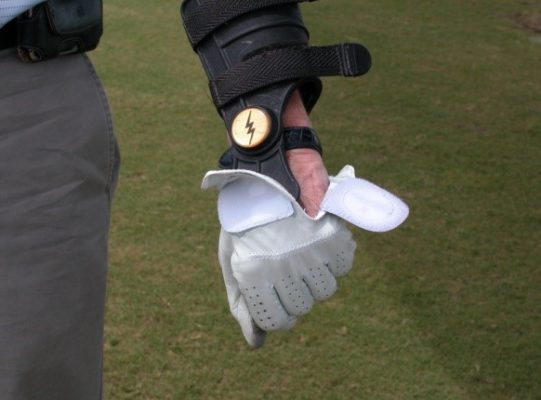
The commercial version of the comb
5. Paper Towel Tube
Cost Estimate: Free. Use an empty roll from your household supplies.
Swing Principle: Proper head cock based on the identification of your dominant eye
How to: Hold the tube with both hands and arms fully extended. Using both eyes, look through the tube at a ball on the ground. Now close your left eye. If you can still see the ball through the tube, you’re right-eye dominant. Otherwise, your left eye is your dominant eye. This will help you to set up correctly with your head cocked so your dominant eye looks directly at the ball.
6. The Teeter-Totter Board Again
Cost Estimate: $5–$10 for a wooden board or piece of scrap wood. A bag of sand is between $5-$10. If you already have an old shaft or sand, there are no additional costs.
Swing Principle: Bounce in sand trap
How to: Place the board on the ground and cover it with a layer of sand equal to the amount of sand you should take on a bunker shot. Place a golf ball on the sand and hit sand shots off the board. The bottom of the club skids rather than digs, just as it should in a real sand shot.
7. Hula Hoops
Cost Estimate: $5–$10 per hoop. Can be found at dollar stores or big-box retailers.
Swing Principle: Improve chipping accuracy and distance control
How to: Hula hoops provide a clear target zone for practicing chip shots, encouraging precision and consistency in landing the ball. Simply place a hula hoop on the practice area or lawn. Aim to land the ball within the hoop. Multiple hoops at varying distances can create a layered challenge.
8. Rubber Bands
Cost Estimate: $1–$3 for a pack of bands.
Swing Principle: Ensure consistent ball contact in the center of the clubface
How to: Rubber bands create a narrower striking area, training golfers to focus on hitting the sweet spot. Wrap a rubber band on each side of the clubface, leaving only a small central area exposed. Practice hitting balls with this setup.
9. Towel
Cost Estimate: Free if using a household towel, or $5–$15 for a golf-specific towel.
Swing Principle: Promote a connected and synchronized swing motion
How to: A towel under the armpits prevents golfers from flaring their arms, encouraging a cohesive swing. Roll up a towel and tuck it under both armpits during practice swings. Focus on keeping the towel in place throughout the swing.
10. Pool Noodle & Broken Club Shaft
Cost Estimate: $2–$5. Widely available in toy or seasonal sections of stores. Free if using a damaged club, or $5–$10 for a replacement shaft from secondhand stores.
Swing Principle: Maintain a proper backswing path
How to: The pool noodle acts as a physical guide to keep the club on the correct path during the backswing. Attach a pool noodle to a broken shaft or alignment stick, positioning it to indicate the desired backswing route. Practice swinging without hitting the noodle.
Takeaway:
Making your own teaching aids is fun and can save you some money. My advice is to make your own teaching aids, then invest the money you save in a series of lessons from a PGA teaching professional.
Learn more!
Want more tips? If you want to take your game to the next level, contact our team at Keiser University’s College of Golf & Sport Management today. With our dedication and experience, we can elevate your game to new heights together. Give us a call today at 888-355-4465.