


How to Regrip a Golf Club: A Step-By-Step Guide
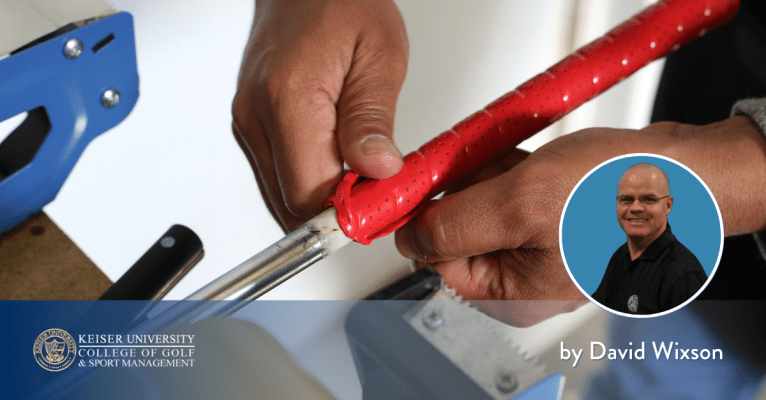
By David Wixson, Keiser University College of Golf Professor – PGA Master Professional
Regripping your golf clubs is a straightforward process that can improve your game by ensuring better control and comfort. This guide provides detailed step-by-step instructions for regripping a golf club at home, along with a few pictures to enhance understanding. You’ll need basic tools and materials, and with a little practice, you can achieve professional-quality results.
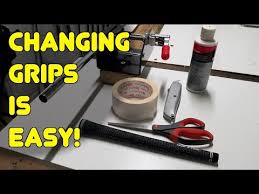
Materials Needed
- New golf grip
- Double-sided grip tape
- Grip solvent (or mineral spirits)
- Utility knife or hook blade
- Vice and shaft clamp (optional but recommended)
- Clean cloth or rag
- Bucket or tray (to catch excess solvent)
- Measuring tape or ruler
- Scissors
- Spray bottle (optional, for solvent application)
Step-by-Step Instructions
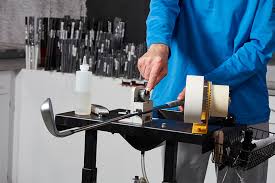
Step 1: Secure the Club
- Secure the golf club in a vice with a shaft clamp to hold it steady, ensuring the clubhead is pointing upward.
- If you don’t have a vice, you can hold the club firmly or have someone assist you. This prevents the shaft from moving during the process.
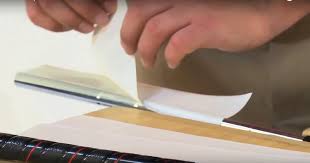
Step 2: Remove the Old Grip
- Using a utility knife or hook blade, carefully cut through the old grip lengthwise along the shaft.
- Start at the top (near the grip’s cap) and slice downward, taking care not to damage the shaft, especially if it’s graphite, as it’s more delicate than steel.
- Peel off the old grip and remove any remaining tape residue using a cloth and solvent.
Step 3: Clean the Shaft
- Wipe down the exposed shaft with a clean cloth and grip solvent or mineral spirits to remove any leftover adhesive or debris.
- Ensure the shaft is completely clean and dry before proceeding to ensure a strong bond with the new tape.
Step 4: Apply Double-Sided Grip Tape
- Measure and cut a strip of double-sided grip tape to match the length of the new grip (typically 10-11 inches).
- Peel off one side of the tape’s backing and wrap it around the shaft, starting just below where the grip will end. Let 1/2″ of grip tape overhang the butt end of the shaft.
- Wrap tape around the shaft; smooth out any wrinkles.
- Twist the 1/2″ overhang of tape into the shaft opening.
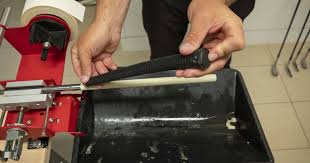
Step 5: Prepare the New Grip
- Place a bucket or tray under the work area to catch any excess solvent.
- Cover the hole at the bottom of the new grip with your finger or tape, then pour a generous amount of grip solvent into the grip.
- Close the top opening with your other hand and shake the grip to coat the interior evenly.
- Remove your finger or tape and pour the excess solvent over the taped shaft to wet the tape.
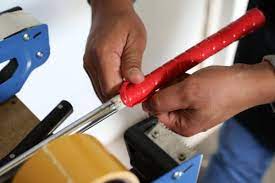
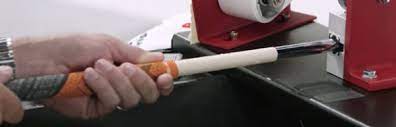
Step 6: Install the New Grip
- Quickly slide the new grip onto the shaft while the tape and grip are still wet with solvent.
- Start at the butt end and push the grip on, aligning it with the clubface (use alignment marks on the grip if available).
- Work fast, as the solvent dries quickly. Ensure the grip is fully seated, with no tape exposed at the bottom of the grip.
Step 7: Adjust and Clean
- Once the grip is on, double-check its alignment with the clubface.
- If adjustments are needed, gently twist the grip while the solvent is still wet.
- Wipe off any excess solvent or adhesive from the grip and shaft with a clean cloth.
- Remove the club from the vice if used.
Step 8: Let the Grip Set
- Place the club in a safe, upright position and allow the grip to dry for at least 12-24 hours to ensure the adhesive bonds properly.
- Avoid using the club until the grip is fully set to prevent slipping.

Tips for Success
- Work in a well-ventilated area: Grip solvent can have strong fumes.
- Use enough solvent: This makes sliding the grip on easier and prevents sticking.
- Check alignment carefully: A misaligned grip can affect your swing.
- Practice on an old club: If you’re new to regripping, practice on a spare club to build confidence.
Ready to Take Your Golf Knowledge Further?
Regripping a golf club is one of the simplest and most cost-effective ways to extend the life of your equipment and improve your overall performance. Fresh grips can enhance comfort, increase control, and help you maintain a consistent swing, especially as grips naturally wear down over time.
If you found this guide on how to regrip a golf club helpful, you might also enjoy learning about advanced techniques for coaching elite golfers or exploring our golf practice drills to improve your short game.
For those who are passionate about the game and want to turn that passion into a profession, consider the Golf Management degree programs at Keiser University College of Golf. Led by PGA Master Professionals, these programs are designed to help you master the technical, teaching, and business aspects of today’s golf industry, from equipment maintenance and swing analysis to leadership in golf operations. Contact us today!
Golf Club Regripping FAQs
How often should I regrip my golf clubs?
Most golfers should regrip their clubs once a year or every 40–60 rounds. If your grips feel slick, hard, or worn, it’s time for a replacement to maintain control and consistency.
Can I regrip my golf clubs without a vice?
Yes. While a vice makes the job easier, you can hold the club securely on a stable surface or ask for help. The key is keeping the shaft steady while removing and installing grips.
How do I choose the right golf grip?
Select a grip size and texture that feels comfortable in your hands. Softer grips improve feel, while firmer ones offer more control and durability in warmer conditions.


have golf works regrip tape. doesnt seem to have two sided adhesive for regripping. what am i missing?